App Editor
CloudWall has built-in IDE, which is intended for authoring and testing apps of jquerymy structure.
App Editor opens type:"manifest" docs — they can be standalone apps, doc editors or app components. All CloudWall interfaces and apps (including App Editor itself) were developed inside App Editor.
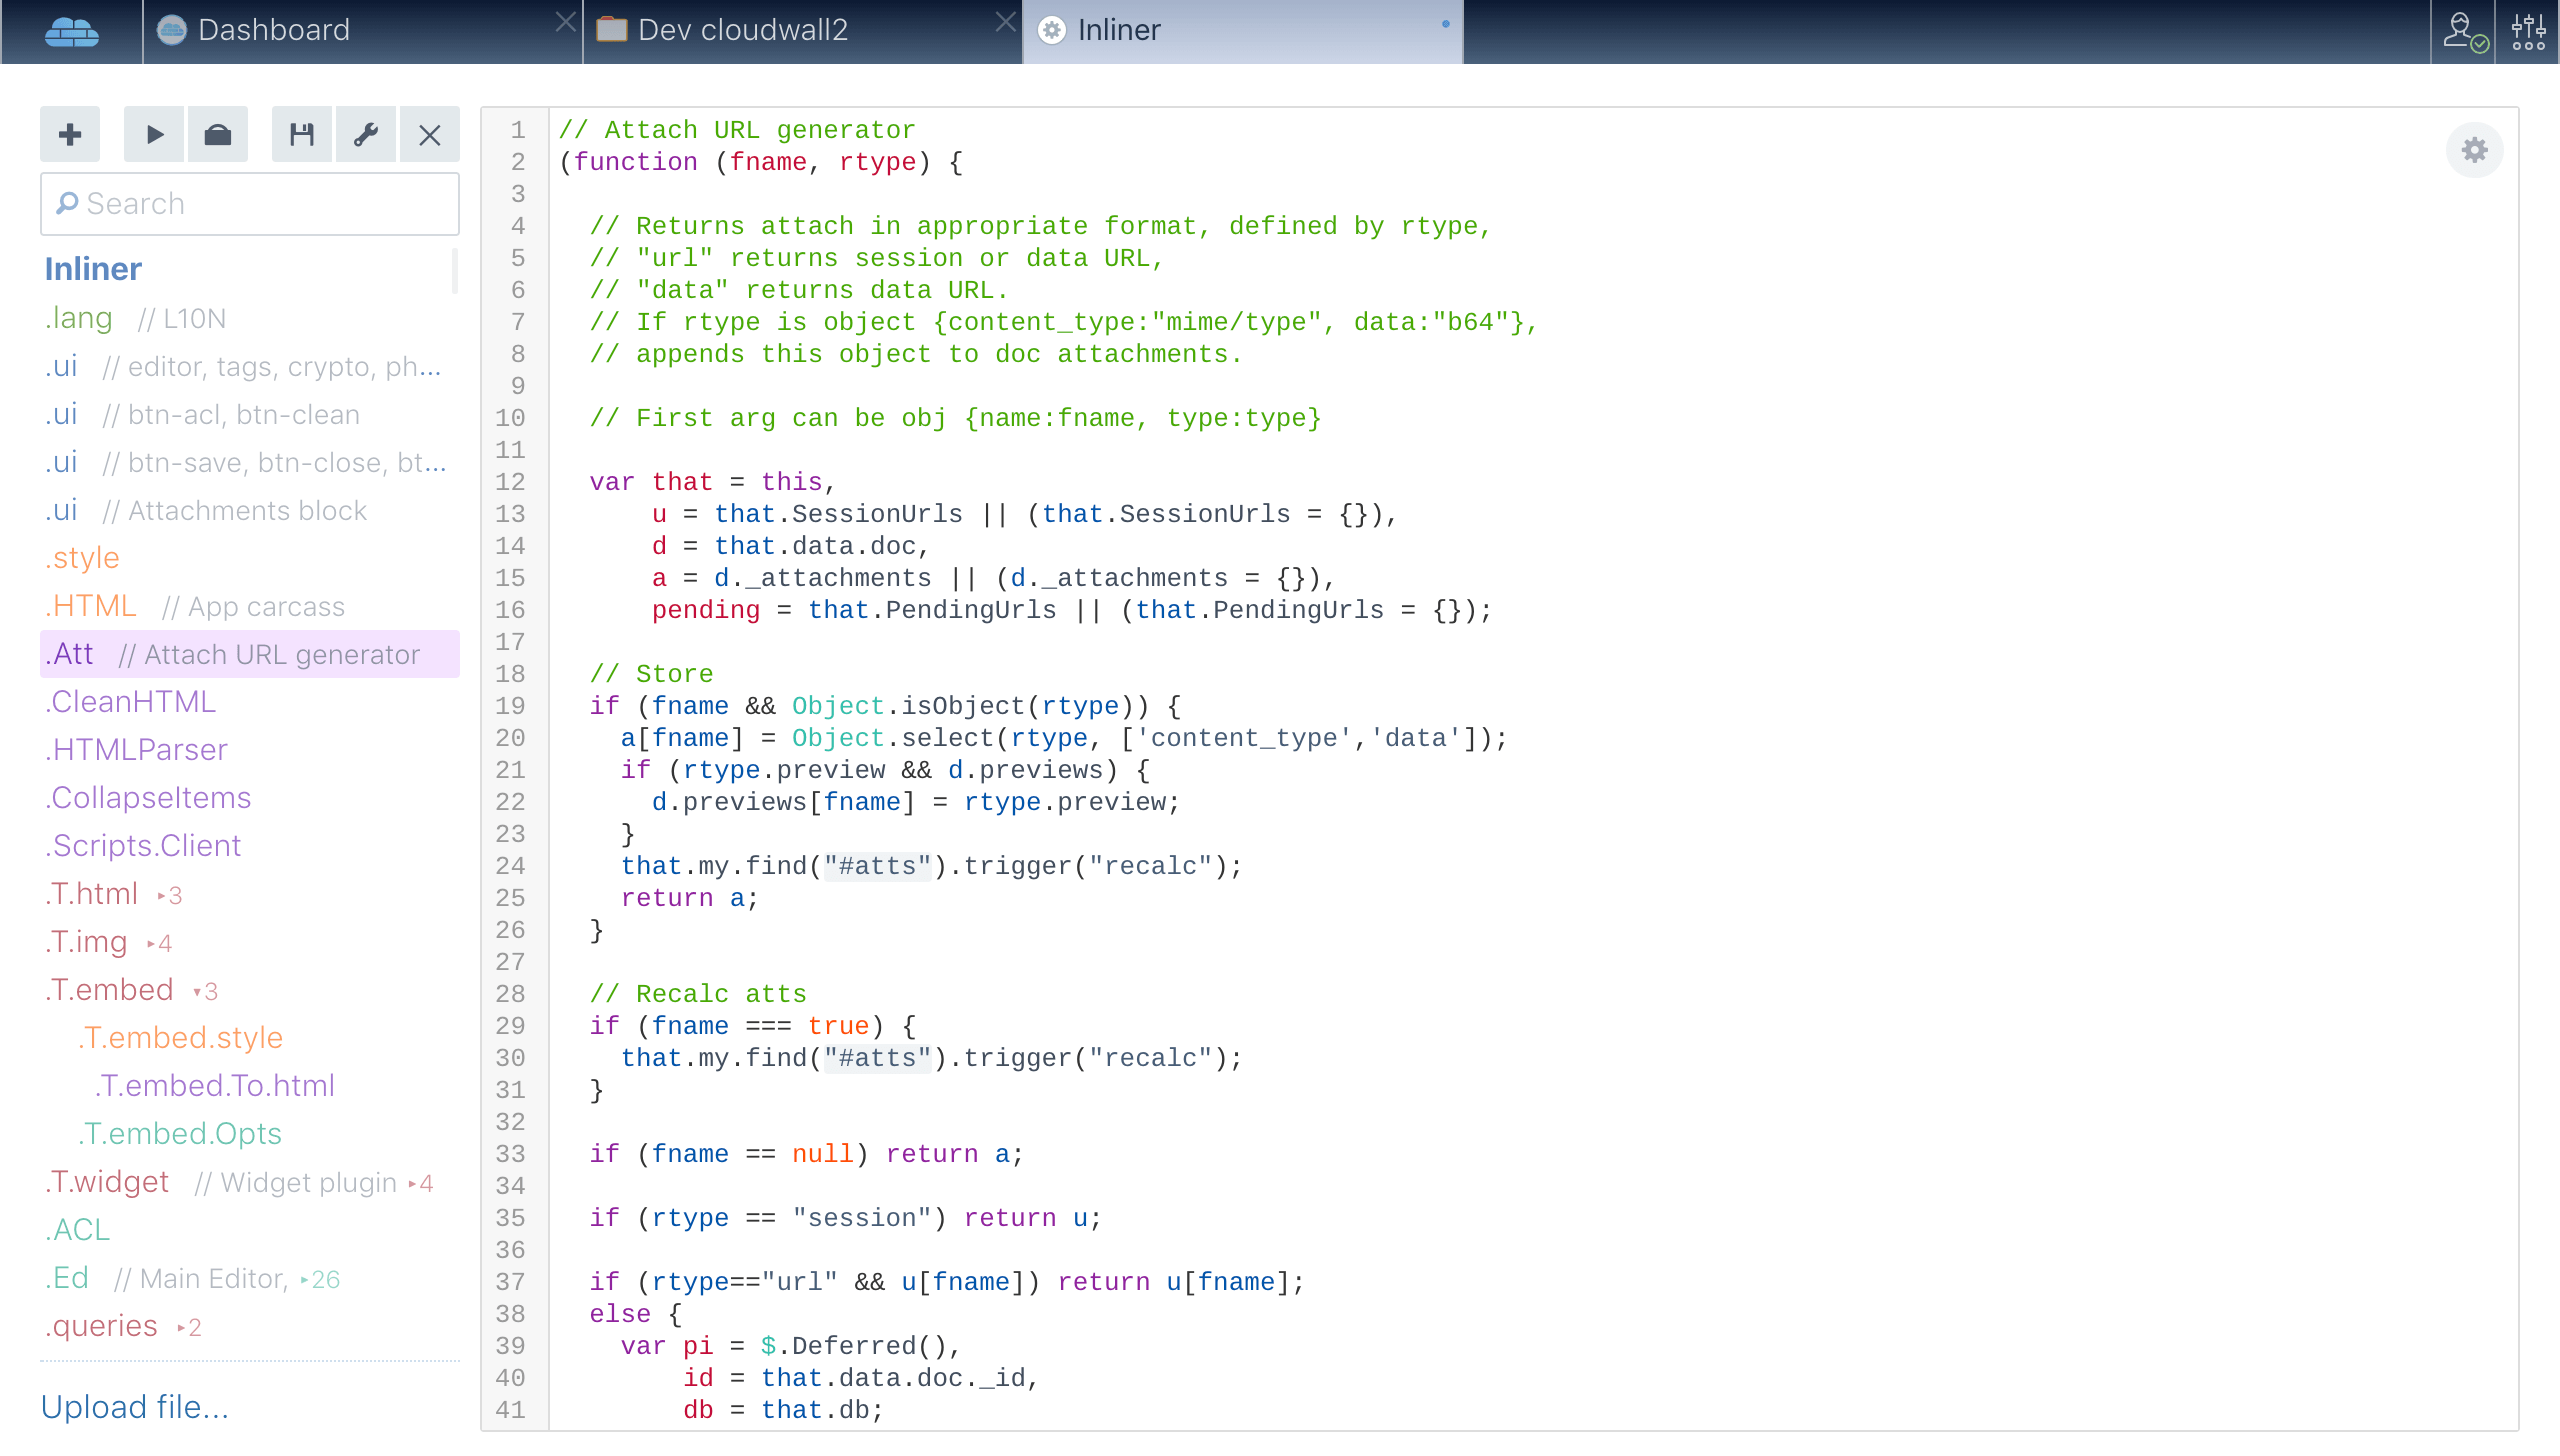
Screenshot of Inliner app source code, opened in App editor.
Click to zoom.
App components
CloudWall apps are jquerymy manifests, so they are JSON docs, trees of nodes. Each row of left column points to a resulting app branch. When app is saved, branches are merged according to their order.
Button adds new branch. To change branch order just drag rows.
Button shows popup with compiled app, warnings and global vars used. Merging — superimposing branches — acts like this:
So you can decompose your app into several branches, each more or less compact, in a way that best suits app complexity. Note you can write expressions that are evaluated when manifest is merged, branch .HTML of above example is written as an expression.
Each tab in App editor remembers its own undo history until app is closed. Tab title is dot notation of a path it should be mounted to.
Ephemeral branches
Each branch has Settings dialog, that pops up on button click. You can set Preview only checkbox to exclude the branch from finalized manifest, only putting it into preview version.
App settings
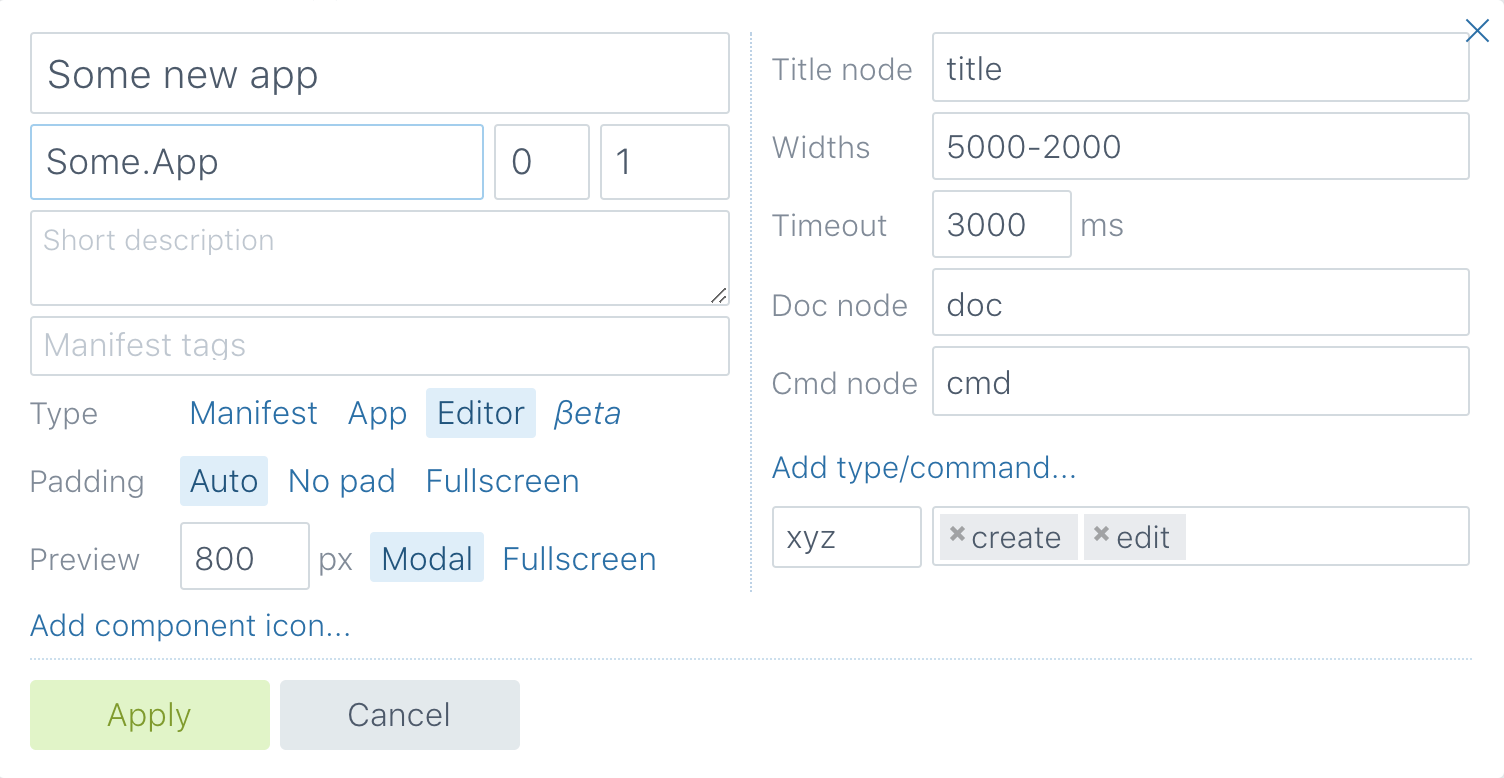
App settings popup, resulting app is an editor
Button opens manifest settings popup. It edits app display name, icon, IdName and version, preferred widths, editable doc types (for editors) and so on.
What is Some.App?
Active field with Some.App string from the screenshot at right is so called IdName property.
IdName defines app/manifest path in cw internal namespace. Path is a string used by system to reference app or manifest within app cache.
Those paths are much like row titles of App Editor, but on more global system level — they can have dot notation, that is used to superimpose components on app start.
For example if you have app with MyApp IdName, and manifest with IdName MyApp.Component, it will be merged into parent app on start.
This approach allows to decouple complex apps into several docs for team development. You can see Inliner app decoupled in that way, all plugins are external to app.
Type and modes
Each manifest doc can be utilized by system in three different modes — app, editor or manifest. Mode is set at the right aside panel.
App. Standalone app, is displayed in app panel of DB docs list. You can define several fields of app data that are reflected to browser address bar and tab title. Also you can restrict max app start time — system will kill app that starts too slowly.
Editor. Sort of app, specially intended to edit docs of some type. Their behavior is little bit more complex — system must control if doc edited was saved when app closes, must provide doc to edit when app launches and so on. Editor apps have extended set of props.
Manifest. When this mode is selected, doc edited is usually a component of another app. Since it never runs standalone, no timeout or masks required.
Beta. It’s not a mode per se, beta selector can be set in addition. While manifest/app is marked as beta, other users (not authors) won’t be able to run it.
Title node
It‘s a dot-notation path in app data section, where runtime title of app resides (if any). When this property changes, system reflects it to browser tab title and to right pane, that is a list of running apps.
State mask
Setting available only for standalone apps, not editors. This app param manages what app data section members are to be reflected into address bar — and back, if app starts from URL.
It can be just string in dot notation, or json object like {"filed1":true, "field2":true}.
Widths
This field enumerates widths in pixels, that are preferrable for your app. Kind of responsive design with restrictions.
It‘s sometimes hard to build UI, that is fully responsive. Set of fixed widths ease up restrictions and allows to focus on UI, not implementation issues.
Field supports combination of fixed values and ranges, like 350 640 1200-2600.
Design an app
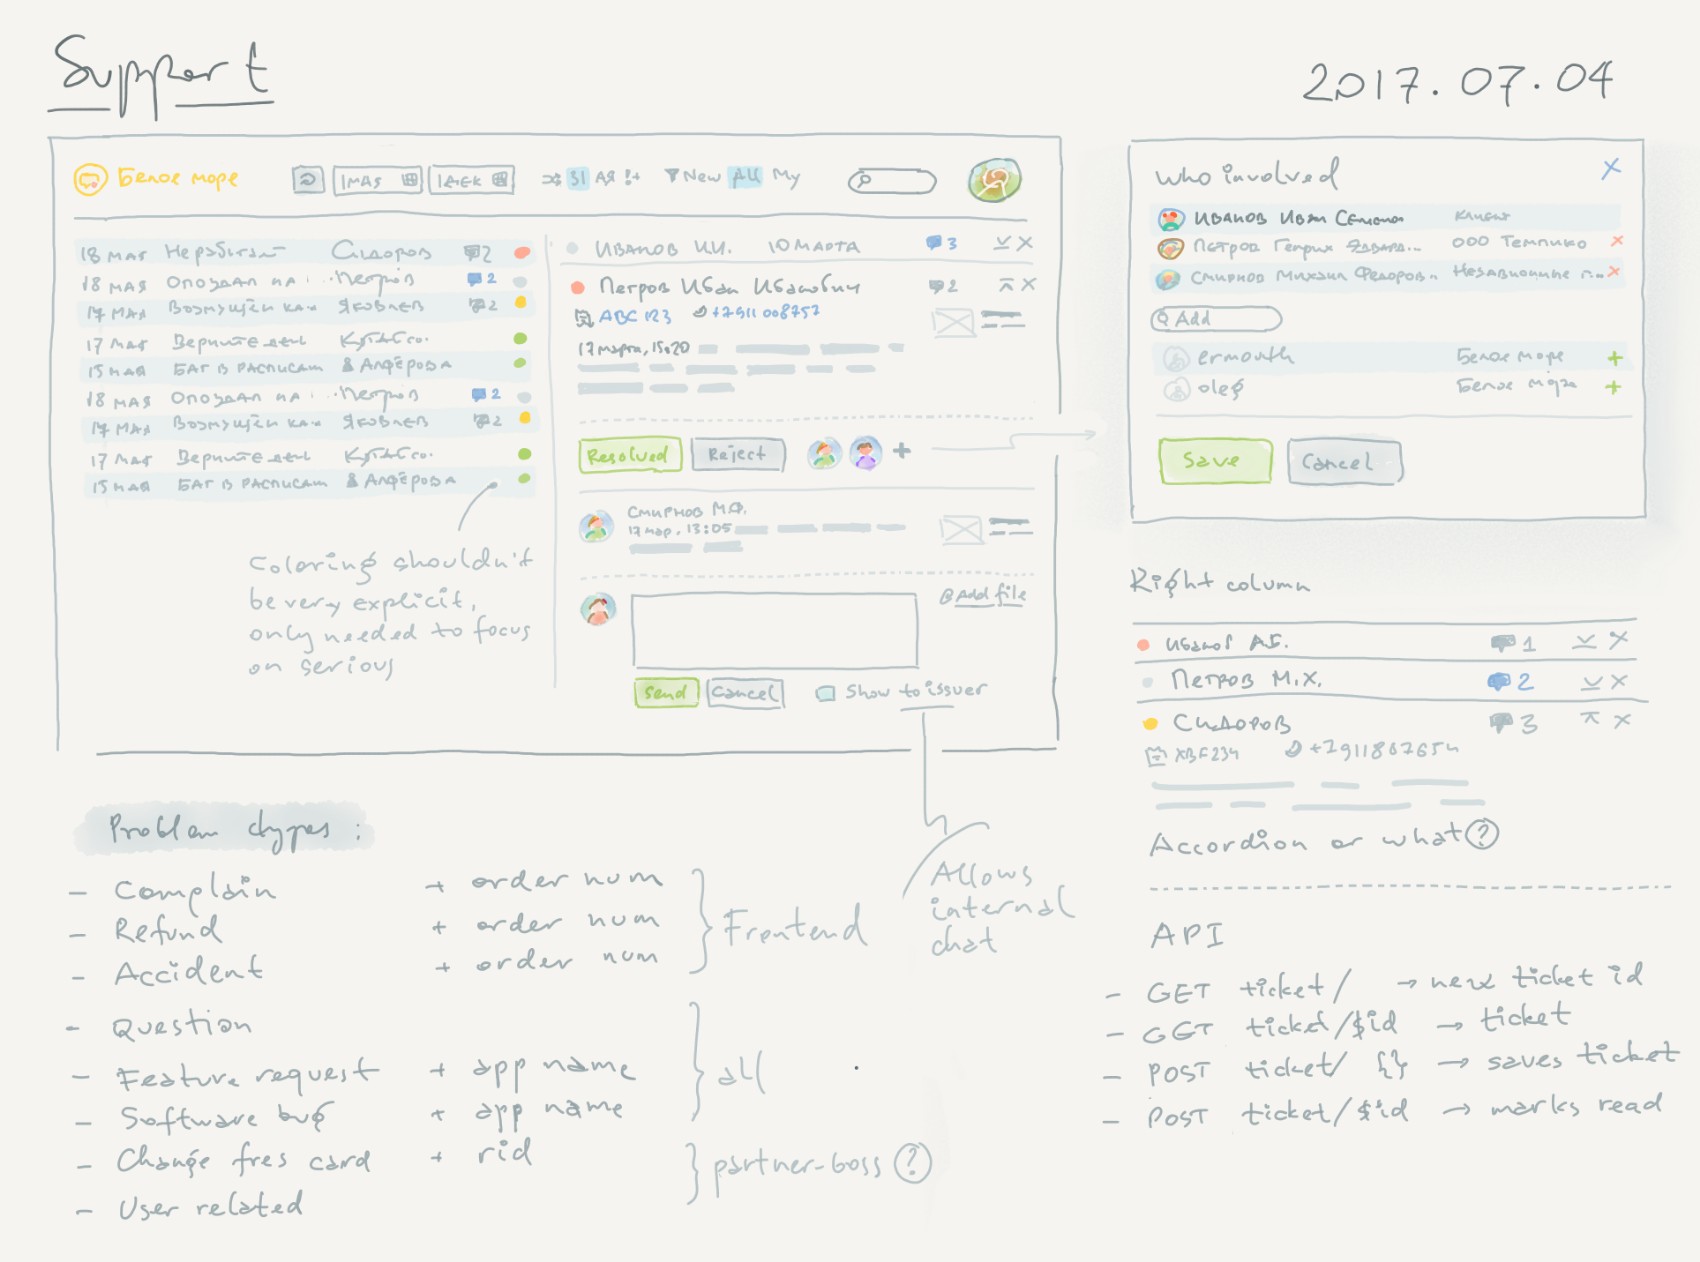
Support app sketch. Implemented in real and successfully working.
The topic requires special coverage, however there exist basic approaches, streamlining the process.
1. Draw it first
Good sketch made by hand, or with Figma, or using Sketch, with hangouts and reasonable details, is essential. It doesn’t need to cover all states, however the idea, layout and basic proportions should be obvious.
2. Decompose sketch
Start implementation with decomposing an app into sub-manifests and common functions. Create an app, name it, and make empty first-level sub-branches, with preferred coloring.
Sub-forms are pop-up manifests, rows of master/detail pairs, lists members, etc. You might need sub-forms collections, ie different manifests for non-uniform lists having elements of different structure.
Common functions are those you plan to make accessible by sub-forms via .inherit:[]. If first-level deep, they are bound to runtime on app start, and see runtime as this object.
3. Emit basic specs
Put comments into each sub-branch you made at step #2. Very often even one-liners are ok.
Sometimes writing those short comments in each app part significantly change initially thought function meaning and manifests boundaries.
4. Create HTML carcass early
Create a branch of type HTML (most CW apps also name it .HTML) and put basic app layout to this branch. Make .init render you carcass. Make .style section, defining related CSS classes and their values.
Coding essential layout early allows to have preview early. Most sketch geometry disproportions become very visible at this stage.
5. Move constants to .lang
If your app may have distribution, write it as multi-lingual from start. Apps are localizable using .lang section, which may have children like en, ru or fr, each consisting of locale constants in appropriate language.
On start one branch is selected according to $.my.locale() param, and mounted as runtime this.lang object. App .HTML branch may have inserts like {BTN_SAVE}, and applying this.HTML.assign(this.lang) during init will substitute all inserts with appropriate constants.
Preview run
Button runs the app in fullscreen or draggable popup. Running in fullscreen prevents CW tab switch until [review closes.
Preview mode is defined in Settings dialog. Most notable feature is preview width, which allows to roughly test app layout for different screen sizes.
Preview mode environment is not identical, but very similar to native CloudWall runtime. App running in preview mode does not have CW-specific this.app.* methods, so can not run other apps and can’t watch own active/inactive state switch.
Errors during preview start are put to browser console.
Preview version of an app has all ephemeral branches applied. This approach allows testing with various data, supplied directly by preview environment.
Debug an app
Debugging is easy knowing several key points:
- Each $.my instance is attached to DOM node and has class
my-form; - Node’s $.my related structures live in
$(node).data('my'); $(appNode).my('manifest')returns app runtime object;$(appNode).my('data')returns app alive.dataobject, which is assumed serializable at any moment;$(appNode).my('errors')returns object with hierarchy of app controls with invalid values, or empty object if state is valid; errors hierarchy does not show invalid fields in app’s popups, they are assumed more or less standalone apps;- When app instance changes its
.datastructure, it triggerschange.myDOM event on its root node; - Generally an app swallows
changeevents of its children.
$0 global variable, and then make calls like $($0).my('manifest'), like this: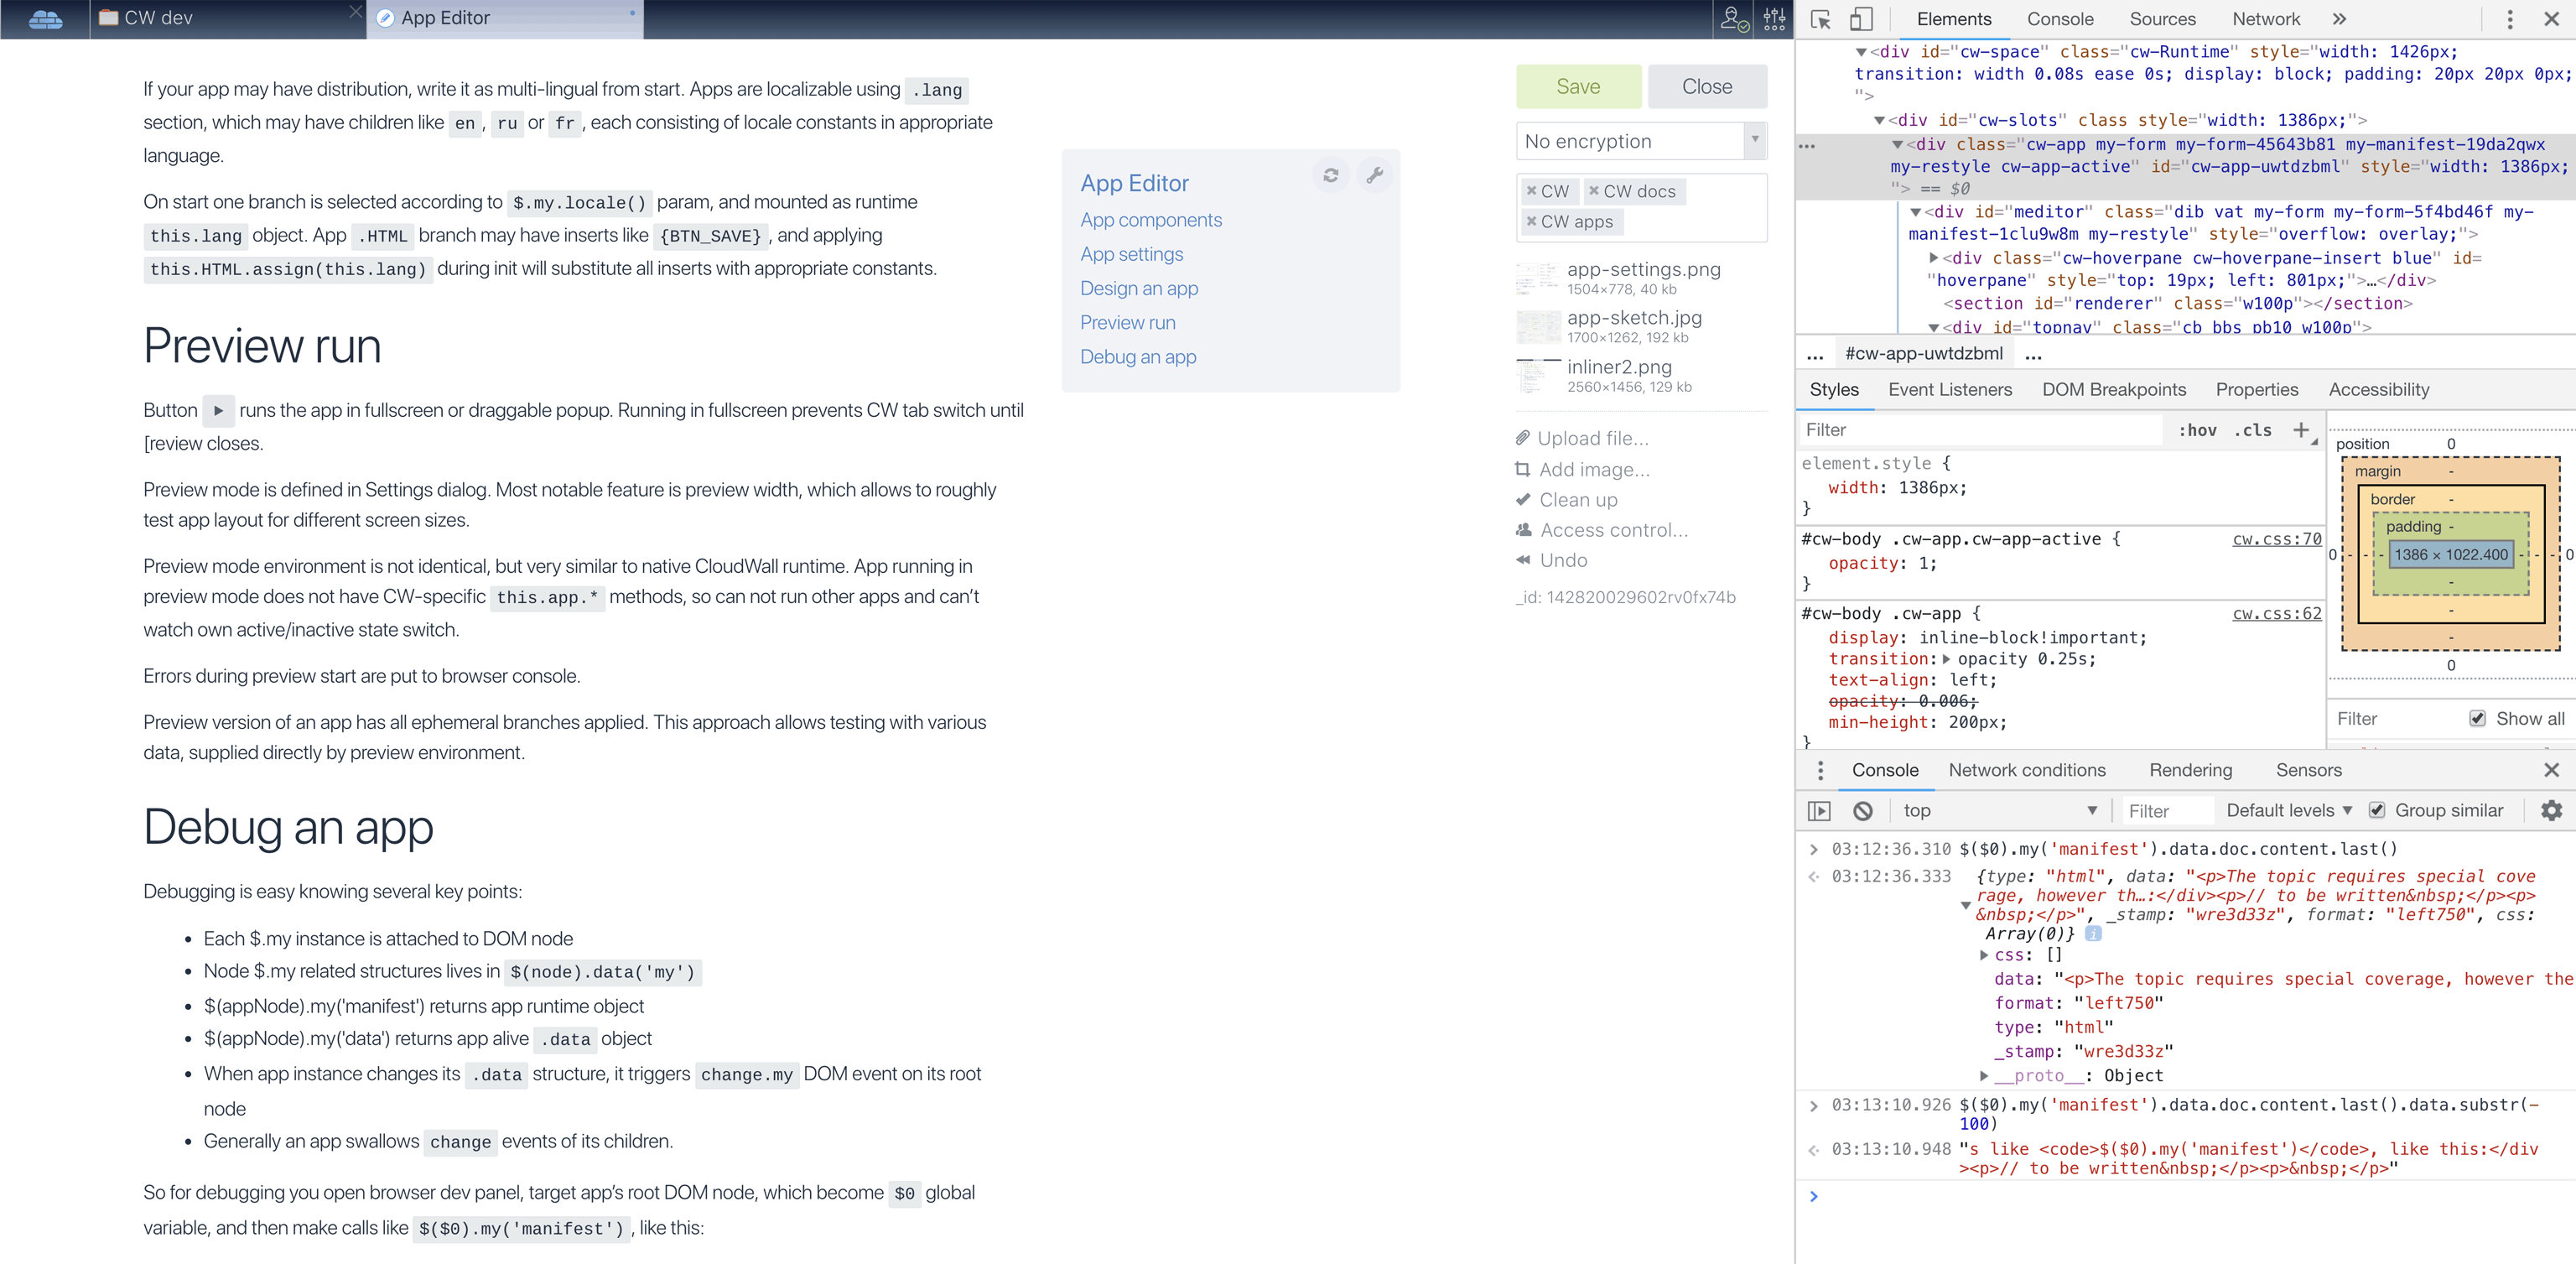
Console shows tail of the document being edited
You can change live .data object, but you should force redraw using $($0).my('redraw') after changing values.
More reliable way is to apply new data object with $($0).my('data', newDataObj).